
Use this phase-based CMS migration checklist to protect search traffic, prevent data loss, and deliver a verified launch. The three items to get right first are tested backups and restores, a complete URL redirect map, and staging QA that includes Search Console URL Inspection. Attach evidence to every row of this checklist, and plan to keep your redirects live for at least a year.
TL;DR:
- Confirm that backups are tested and restorable, with documented restore procedures validated before proceeding with the migration.
- Maintain a comprehensive, version-controlled redirect map and keep redirects active for at least one year to protect search rankings.
- Perform thorough staging QA, including Search Console URL Inspection, to catch crawlability, structured data, and performance issues before launch.
- Ensure all content, media, and integration assets are properly migrated, verified with checksums, and tested to prevent broken pages or functionalities.
- Verify that post-launch monitoring is in place for at least two weeks, tracking KPIs, index coverage, and error spikes to catch and fix issues early.
Table of Contents
- The eight phases of a CMS migration checklist
- Setting up pre-migration planning and governance
- Building your content inventory and audit
- Backups, contingency planning, and recoverability testing
- Mapping URLs and preserving search visibility
- Migrating data, media, and other assets without breaking pages
- Mapping content models, templates, and fields
- Verifying integrations, authentication, and third-party connectors
- Running staging QA before you commit to launch
- Running cutover day without surprises
- Monitoring after launch and fixing what breaks
- Getting final sign-off before you call it done
- How Magic Logix supports migration planning and execution
- Training your team on the new CMS
- Handling data privacy and compliance during migration
- Practitioner perspective: the traps that catch experienced teams
- Get hands-on help running your CMS migration
- Where to check the technical standards behind this checklist
- Sources
- FAQ
The eight phases of a CMS migration checklist
A CMS migration goes smoother when you treat it as a sequence of gates rather than one big leap. Each phase below has a clear owner and a specific artifact that proves it’s done, not just done in someone’s head.
- Plan: the project lead defines goals, timeline, and rollback criteria; artifact is a signed project charter.
- Inventory: the content owner catalogs every page, asset, and content type; artifact is a scored inventory spreadsheet.
- Backups: the platform or SRE lead confirms tested, restorable backups exist; artifact is a restore test log.
- Map and redirect: the SEO lead builds the old-to-new URL map; artifact is a redirect test CSV.
- Migrate assets: the developer moves content, media, and data; artifact is a checksum verification report.
- QA and staging: the QA team runs functional, SEO, and performance tests; artifact is a QA sign-off list.
- Cutover: the project lead executes launch steps in order; artifact is the cutover log with timestamps.
- Post-launch monitoring: the SEO and analytics leads track KPIs for at least 14 days; artifact is a daily monitoring report.
Each phase feeds the next. Skipping the evidence step in one phase tends to surface as a fire drill two phases later.
Setting up pre-migration planning and governance
Before anyone touches a line of content, define what success looks like in numbers you can check later: organic traffic held within an acceptable range, conversion rate stable, and a recovery time objective (RTO) and recovery point objective (RPO) that match your business’s tolerance for downtime and data loss. NIST’s contingency planning guidance frames RTO and RPO as the backbone of any recovery plan, and a CMS migration is a recovery plan you’re choosing to run on your own schedule.
Assign owners early so nobody assumes someone else is handling the redirect map:
- Content owners confirm what moves, what gets rewritten, and what gets retired.
- SEO lead owns the URL map, redirect testing, and Search Console verification.
- Platform or SRE lead owns backups, restore tests, and infrastructure security.
- QA lead owns the staging test plan and sign-off.
- Project manager owns the timeline, the risk register, and stakeholder updates.
- Legal or privacy contact reviews data handling if the migration touches personal information.
Build a risk register that lists what could go wrong (broken redirects, lost form submissions, expired SSL certificates) alongside a mitigation for each, and set a communication cadence so stakeholders aren’t finding out about downtime from a customer complaint.
Before any deployment, require a pre-deployment gate: a short list of artifacts (backup confirmation, redirect map, QA sign-off) that must exist and be signed off before cutover begins.
Pro Tip: Write your rollback criteria before you write your launch plan. Deciding what “failure” looks like after the fact always favors optimism over evidence.
Building your content inventory and audit
You can’t migrate what you haven’t counted. Start by pulling a full inventory from your current CMS export, a site crawler like Screaming Frog or Sitebulb, your analytics platform, and a backlink report from a tool such as Ahrefs or Semrush. Each source catches things the others miss, orphaned pages, low-traffic pages with strong backlinks, or pages that exist in the CMS but were never linked internally.
- Export every URL, title, content type, and last-modified date from the CMS.
- Crawl the live site to catch pages the CMS export might not surface, including redirects and error pages.
- Pull traffic, conversions, and backlink counts for each URL and merge them into one scoring sheet.
- Score each page on a simple matrix: traffic, conversions, backlinks, recency, and technical fit with the new content model.
- Apply decision rules: migrate as-is for strong performers, migrate-and-redraft for outdated but valuable pages, merge for near-duplicate content, and retire for stale or zero-traffic pages with no backlinks.
A retail client page that ranks for a valuable term but hasn’t been updated in years is a migrate-and-redraft candidate, not an automatic keep. Two blog posts covering the same topic from different years are merge candidates, with the weaker one redirecting to the stronger.
Once decisions are made, prepare a sitemap of everything that survives and confirm canonical tags point to the version you’re keeping, since this becomes the backbone of your redirect map in the next phase.
Pro Tip: Treat “retire” as a real decision, not a default. A page you forget to redirect is a 404 waiting to happen.
Backups, contingency planning, and recoverability testing
Backups you haven’t tested are a guess, not a plan. NIST’s contingency planning bulletin recommends documented recovery objectives paired with regularly tested restore procedures, and the 3-2-1 rule is a practical way to operationalize that: three copies of your data, on two different media types, with one copy off-site.
- Keep one copy on your production environment, one on a separate backup server or storage service, and one in cloud storage outside your primary provider.
- Set an RTO and RPO for your most important assets (the database, media library, and customer data) and write them down where the whole team can see them.
- Schedule restore tests, not just backup jobs, and log the exact command run, the time it took, who validated it, and whether it passed.
- Remove hardcoded secrets and API keys from config files before the migration and move them to a managed secret store.
Backups without a tested restore path are not a recovery plan. NIST’s guidance treats the restore test, not the backup job, as the point where recoverability is actually proven.
A restore test record can be as simple as a dated line: “March 3, restored production database snapshot to staging, 22 minutes, verified row counts matched, signed off by [platform lead].” That single line is worth more than a dozen backup confirmation emails.
Mapping URLs and preserving search visibility
Redirect mapping is the single most consequential technical step in a CMS migration, and it’s also the one most likely to get rushed.
- Export every live URL from your inventory and pair it with its destination URL in the new CMS.
- Store that mapping as a version-controlled CSV or spreadsheet, not a set of ad hoc rules someone remembers.
- Implement server-side permanent redirects (HTTP 301 or 308) rather than client-side or meta-refresh redirects.
- Test every redirect in staging before launch, then retest a sample against the live environment immediately after cutover.
Google’s Search Central documentation recommends server-side 301 or 308 redirects for site moves and advises keeping them active for at least a year, since search engines and external sites take time to update their own links.
- Update your sitemap.xml to reflect only the new URLs and submit it in Search Console.
- Update internal links and canonical tags so they point to new URLs directly, not through a redirect chain.
- Verify both the old and new properties in Search Console so you can compare crawl and index data during the transition.
- Watch the coverage report and crawl stats for a spike in 404s in the two weeks following launch.
Good site architecture makes this whole process easier, since a logical URL structure gives you fewer one-off exceptions to track.
Pro Tip: Redirect chains (A to B to C) quietly cost crawl budget and page speed. Collapse every chain to a single hop before launch.
Migrating data, media, and other assets without breaking pages
Media migration fails quietly. Images load fine in a browser cache for weeks before someone notices the file paths are broken for new visitors.
- Export content and media together with their metadata: alt text, captions, and authorship, not just the file itself.
- Normalize file paths and CDN references so they match the new CMS’s expected structure, and rehost anything that used a provider-specific URL pattern.
- Run checksums or hashes on large asset batches before and after transfer, and log the results so a corrupted file doesn’t surface months later as a support ticket.
- Convert images to responsive, optimized formats the new CMS supports, rather than carrying over whatever format the old system happened to use.
A media library with a thousand images and inconsistent alt text is a good moment to fix accessibility gaps you’ve been meaning to address, since you’re touching every file anyway.
Mapping content models, templates, and fields
Your old CMS and new CMS almost never share the same idea of what a “page” is, and that mismatch is where rendering breaks.
- Inventory every content type in the current system: blog post, product page, landing page, and any custom types.
- Map each field in the old model to its equivalent in the new content model, and write down any transformation rule needed (date format changes, rich text conversion, taxonomy renaming).
- Build one representative sample record per content type and render it in staging before migrating the full dataset.
- Document editorial notes and template fallback behavior so writers know what happens when a field is left blank.
Catching a broken field mapping on one sample record saves you from finding it on three thousand live pages.
Verifying integrations, authentication, and third-party connectors
Every CMS migration touches systems beyond the CMS itself, and those are easy to forget until something silently stops working.
- Inventory every integration (analytics, CRM, payment processor, marketing automation) along with its credentials, endpoints, and internal owner.
- Test each API contract and its error handling in staging before assuming it will behave the same way in the new environment.
- Reinstall tracking pixels and Tag Manager containers in the new templates, and reverify your Search Console property, since verification files and tracking snippets don’t carry over automatically between platforms.
- Plan for webhook replays and queued jobs so time-sensitive workflows (order confirmations, form notifications) don’t get dropped during the switch.
A payment integration that works in a sandbox but wasn’t tested against the live gateway’s actual error responses is a common source of cutover-day surprises.
Running staging QA before you commit to launch
Staging QA is where you catch the difference between “it looks fine” and “it actually works.”
- Run automated smoke tests across critical templates, then walk manual test cases for your highest-value user journeys (checkout, lead form, account login).
- Use the URL Inspection tool in Search Console to test a representative sample of new URLs before opening the site to indexing, which Google recommends as a way to catch crawlability and structured data issues early.
- Compare Core Web Vitals against your pre-migration baseline rather than an arbitrary target.
- Check accessibility, cross-browser rendering, and every form and payment flow on both desktop and mobile.
| Check | Tool or method | Pass threshold |
|---|---|---|
| Largest Contentful Paint | Lab or field data comparison | 2,500 ms or less at a recommended percentile (Web) |
| Interaction to Next Paint | Lab or field data comparison | 200 ms or less at a recommended percentile (Web) |
| Cumulative Layout Shift | Lab or field data comparison | 0.1 or less at a recommended percentile (Web) |
| Sample URL indexing readiness | Search Console URL Inspection | No crawl or structured data errors |
A conversion audit of your critical journeys before launch catches the kind of friction that a functional test alone might pass right over.
Running cutover day without surprises
Cutover day works best as a script, not an improvisation.
- Lower DNS TTL well in advance so the switch propagates quickly, and confirm who runs each step with a contact list on hand.
- Validate in this order immediately after the switch: redirects, a sample of live pages, analytics data ingestion, then forms and checkout.
- Set monitoring thresholds that automatically flag a rollback conversation: a spike in server errors, a traffic collapse beyond normal variance, or any payment failure.
- If rollback is triggered, follow documented steps exactly and confirm success against the same checks used for the original cutover.
Pro Tip: Assign one person the sole job of watching error rates and traffic for the first hour after launch. Everyone else is heads-down fixing things; someone needs to be watching the dashboard.
Monitoring after launch and fixing what breaks
The first two weeks after launch decide whether your migration was quiet or painful.
- Check index coverage, new 404s, and traffic and conversions against baseline every day for the first 14 days.
- Set up automated alerts for error spikes or metric drops so you’re not relying on someone noticing a graph.
- Decide in advance what counts as a hotfix versus a planned release, and document every fix with what broke and why.
- Schedule a retrospective once things stabilize and update this checklist with whatever you learned, since the next migration will be easier for it.
A search marketing team watching paid and organic performance together during this window catches issues a purely technical dashboard might miss, like a landing page that renders fine but converts differently.
Getting final sign-off before you call it done
Go-live shouldn’t rest on a verbal “looks good.” Each stakeholder attaches a specific artifact:
- SEO lead attaches the redirect test report and Search Console verification screenshots.
- Platform lead attaches the restore test log and security scan results.
- QA lead attaches the completed test case list with pass or fail marked for each.
- Project manager keeps an escalation contact list active for the 48 to 72 hours after launch.
Once sign-off is complete, hand over documentation to the operations and editorial teams, and put a date on the calendar for the retrospective.
How Magic Logix supports migration planning and execution
Migration planning is a familiar part of digital marketing and web development work, not a one-off request.
- Migration plans typically include a content inventory, a redirect map, and a QA sign-off list as concrete deliverables.
- Evidence artifacts such as restore test logs, redirect test results, and QA pass lists should be produced rather than relying on verbal confirmation.
- Businesses can request a migration plan review or a template set through our ecommerce development and web services pages.
Training your team on the new CMS
A migration isn’t finished when the site goes live. It’s finished when your editorial team can use the new system without opening a support ticket every time they want to publish a page.
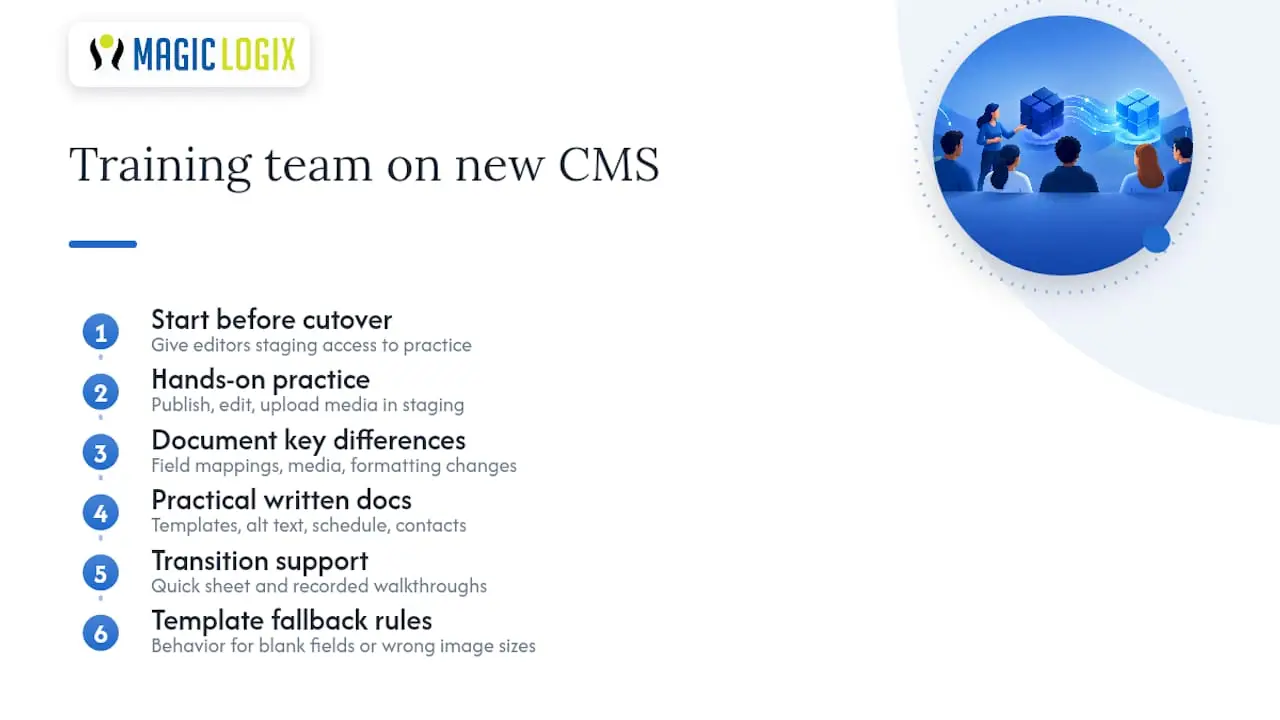
Start training before cutover, not after. Give content editors access to the staging environment once your sample records are rendering correctly, and let them practice publishing, editing, and uploading media in a low-stakes setting. Document the differences that matter most: how fields map to what they saw in the old CMS, how media uploads work, and where formatting options changed.
Written documentation should cover the basics any editor needs day to day: how to create a new page from a template, how to add alt text and metadata, how to schedule or unpublish content, and who to contact when something looks wrong. A short internal wiki page beats a long PDF nobody opens twice.
Plan for a transition period where both old habits and new workflows get some support. Some editors will want a quick reference sheet taped to their monitor, others will want a recorded walkthrough they can replay. Offering both costs little and prevents the same question landing in your inbox five times.
Template fallback behavior deserves its own note in the documentation: what happens when an editor leaves a required field blank, or uploads an image in the wrong dimensions. Editors who know what the system will do in those cases make fewer mistakes and file fewer “is this broken” tickets in the first month.
Handling data privacy and compliance during migration
Moving content and data between systems is also a data handling event, and it deserves the same scrutiny you’d give any other transfer of personal information.
Start by identifying what personal or sensitive data lives in your current CMS: customer account details, form submissions, payment records, or newsletter subscriber lists. Confirm where that data will live in the new system and whether the new CMS or hosting provider changes your data residency or processing arrangements in a way that affects existing privacy commitments to users.
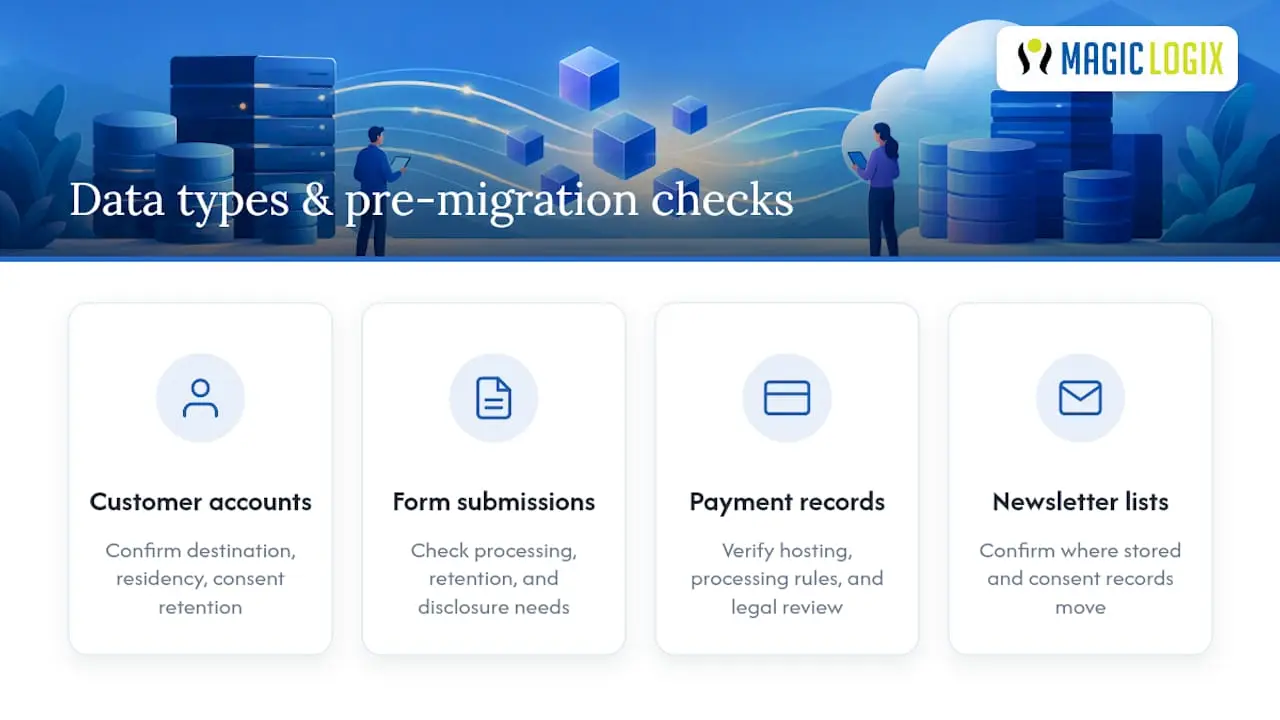
If your business operates under a data protection framework such as the CCPA or a sector-specific rule, loop in your legal or privacy contact before migration begins, not after. They can confirm whether the migration itself needs to be disclosed to users, whether consent records need to move with the data they describe, and whether any retention schedule needs to be respected rather than reset by the move.
Remove hardcoded credentials, API keys, and access tokens from old configuration files and exports rather than carrying them into the new environment. OWASP’s guidance on CI/CD security recommends scanning repositories for exposed secrets with tools like git-secrets or gitLeaks and moving anything found into a managed secret store.
Finally, apply the same access controls to your migration tooling that you’d apply to production. A temporary export sitting in an unsecured spreadsheet is a compliance gap even if the final destination is locked down properly.
Practitioner perspective: the traps that catch experienced teams
The mistakes that derail a CMS migration are rarely the big obvious ones. They’re the small things nobody thought to check.
- Analytics and verification tags get left off new templates, so traffic data goes dark for days before anyone notices.
- Secrets and API keys left in old config exports or repos sit exposed long after the migration is “done.”
- Cached CDN content shows visitors a stale version of the site while the team is confident the new one is live.
Run a quick pre-cutover check on all three: view source on a sample page to confirm tags fire, scan repos for exposed credentials, and purge CDN caches before calling launch complete. Treat the whole migration as an auditable gate. If a checklist row doesn’t have evidence attached, it isn’t done, no matter how confident anyone feels about it.
— Hassan
Get hands-on help running your CMS migration
Running a migration checklist well takes time most marketing and content teams don’t have free, on top of their regular workload. Technical execution can be handled by an experienced team while your team focuses on content decisions and stakeholder communication.
- Migration audit: we review your current site, content inventory, and technical setup, and flag risks before you commit to a timeline.
- Migration plan and execution: our web development team builds the redirect map, runs the technical migration, and documents restore and QA evidence along the way.
- Post-launch support: we monitor traffic, indexing, and conversions through the critical first weeks and hand off a clean report at the end.
A typical engagement runs audit, then plan, then cutover support, then a follow-up window of ongoing monitoring, structured around your launch date rather than a fixed template. If you’re weighing whether to run this in-house or bring in support, reach out through our web development page and we’ll scope what your migration actually needs.
Where to check the technical standards behind this checklist
- Google Search Central’s site move guide sets the official standard for redirects and URL changes during a migration.
- Google Search Console’s URL Inspection tool documentation covers how to validate new URLs before they’re indexed.
- NIST’s contingency planning bulletin is the reference behind backup, RTO, and RPO practices.
- OWASP’s threat modeling guidance supports the security review steps in the planning phase.
- A 4 to 8 week SEO-focused migration checklist offers a practical timeline reference for teams mapping their own schedule.
Sources
- Site moves and migrations | Google Search Central
- URL Inspection tool | Google Search Console Help
- ITL Bulletin: Contingency Planning Guide for Information Technology Systems
- OWASP Threat Modeling
FAQ
What is a CMS migration?
A CMS migration is the process of moving a website’s content, structure, and functionality from one content management system to another, or to a significantly updated version of the same system. It typically includes moving pages, media, and data while preserving search visibility, user access, and integrations with other tools.
What are the key steps to include in a data migration checklist?
A solid data migration checklist covers backups and tested restores, a content inventory with migrate or retire decisions, a full URL redirect map, integration and credential verification, and staging QA before cutover. NIST’s contingency planning guidance recommends documenting recovery objectives and testing restores as part of that process, rather than treating backups as a checkbox.
What are the general steps for a CMS migration?
The general sequence is plan, inventory, back up, map URLs and redirects, migrate assets, run staging QA, execute cutover, then monitor closely after launch. Each phase should produce a specific artifact, like a redirect test file or a QA sign-off list, before the team moves to the next one.
What are the top data migration tools?
Common tools include site crawlers like Screaming Frog or Sitebulb for inventory and redirect auditing, backlink tools like Ahrefs or Semrush for scoring content value, and secret-scanning tools like gitLeaks or truffleHog for cleaning credentials before migration. The right combination depends on your CMS, your content volume, and whether your migration includes a hosting change.
How long should redirects stay active after a CMS migration?
Google’s Search Central guidance recommends keeping server-side 301 or 308 redirects active for at least a year after a site move. This gives search engines and external sites time to update their own links to the new URLs.